Training Guide 03
AI Photo Studio — edit any photo by describing it
AI Image creates pictures from nothing. Photo Studio works on pictures you already have: remove a background, erase something you don't want, extend the edges, swap an object, or drop your product into a completely new scene. Twelve tools, one upload, no editing software.
01 Before you start
One upload, twelve different jobs.
📤What you need
One image — PNG, JPG or WEBP. That's the only requirement.
🛠️What it does
Twelve separate editing jobs, each powered by a purpose-built AI model.
⚡What it costs
5 to 60 media credits per image, shown next to every tool before you pick it.
02 The screen, explained
A single column of controls, and a preview panel on the right.
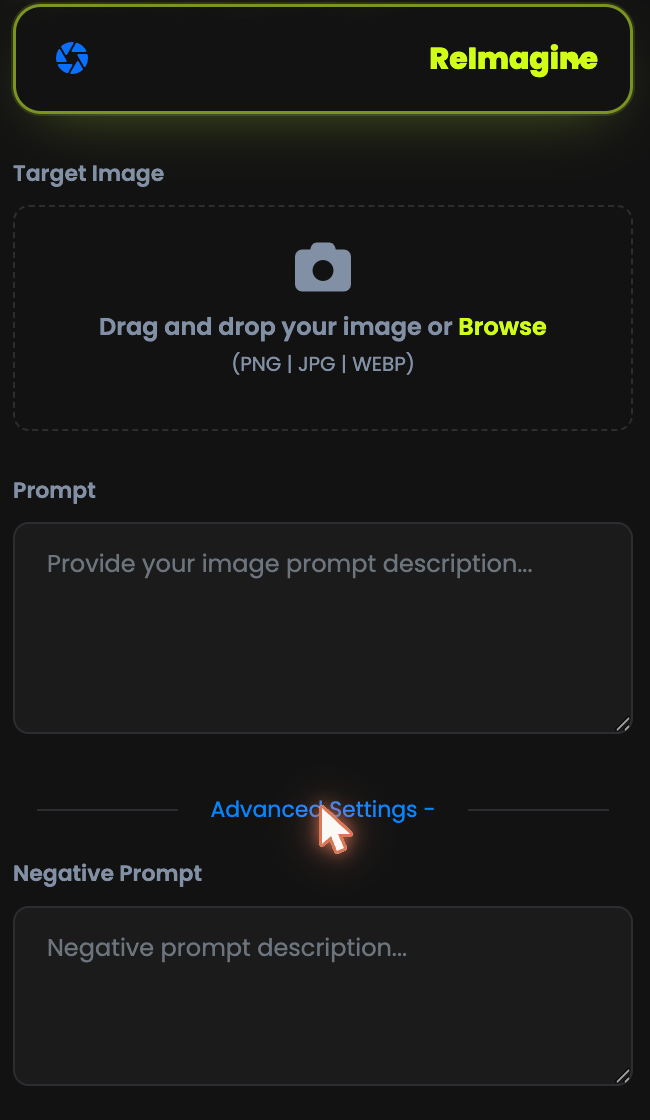
SELECT EDITING OPTIONS
Which job you want done. This is the most important choice on the page — everything else depends on it.
Target Image
Drag and drop, or browse. PNG, JPG or WEBP.
Prompt
What you want. Some tools need it, some ignore it — see below.
Advanced Settings +
Optional fine control. Skip it until you need it.
03 Your first edit
Turn a plain product photo into a styled scene, in one step.
Choose Reimagine
It keeps your subject and rebuilds everything around it.
Drop in a photo
A product shot on a plain white background is the perfect test — the duller the original, the more obvious the result.
-
Describe the scene you want instead
place the bottle on wet stone with tropical leaves behind it, golden hour light, soft shadows Press Generate
Your edited image appears in the panel on the right, and is saved to your library.
The clearer the subject in your original — well lit, in focus, not overlapping other objects — the better every tool here performs. A blurry phone snap limits what any AI can do with it.
04 All 12 editing tools
What each one actually does, and what it costs.
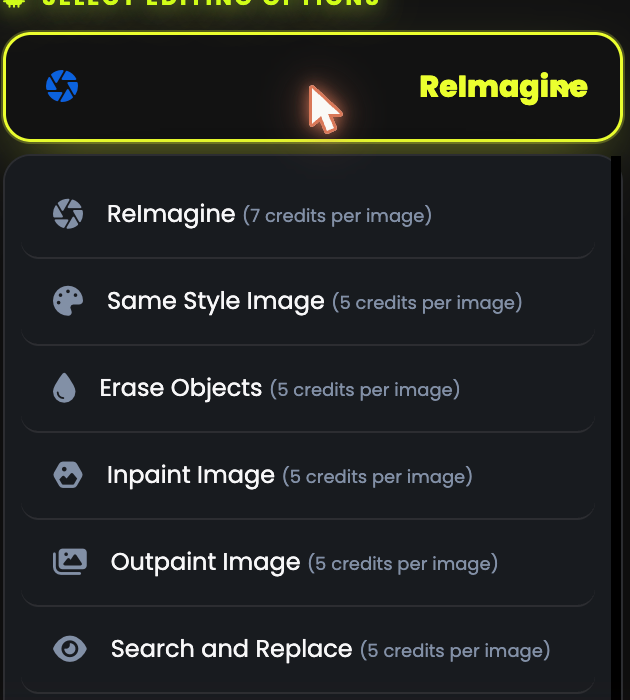
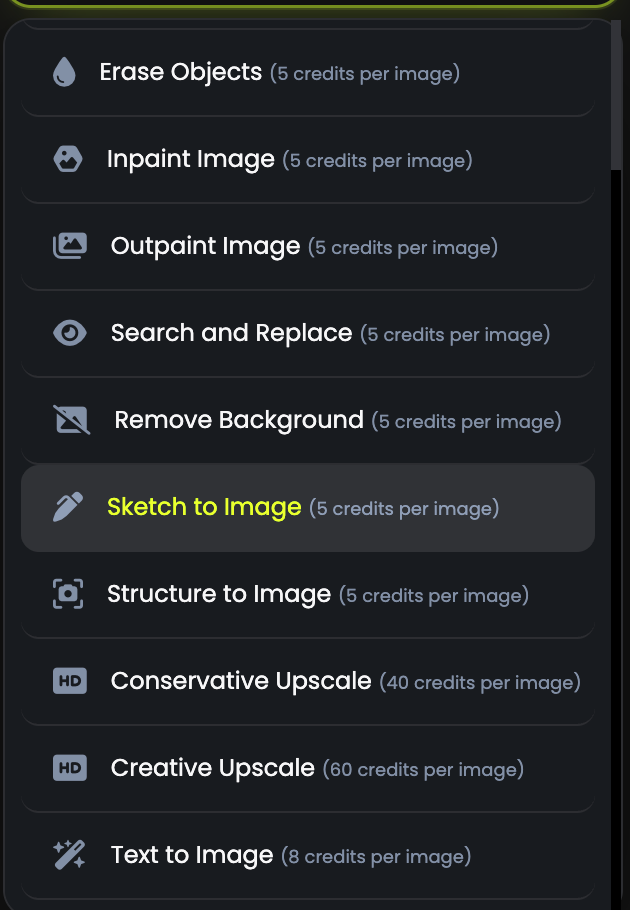
The list scrolls — the price per image is beside every tool.
| Tool | Cost | What it does |
|---|---|---|
| Reimagine | 7 | Keeps your subject, rebuilds the scene around it from your description. The most versatile tool here. |
| Same Style Image | 5 | Creates a new image that matches the look and feel of the one you uploaded. Ideal for a consistent set. |
| Erase Objects | 5 | Removes something you don't want and fills the space naturally. |
| Inpaint Image | 5 | Repairs or replaces part of an image with something you describe. |
| Outpaint Image | 5 | Extends the picture beyond its original edges — turn a square into a banner without cropping. |
| Search and Replace | 5 | Name an object and what to put there instead. "Replace the mug with a glass bottle." |
| Remove Background | 5 | Cuts your subject out cleanly. Name the subject in the prompt box. |
| Sketch to Image | 5 | Turns a drawing or rough sketch into a finished picture. |
| Structure to Image | 5 | Keeps the composition and shapes of your original, but renders it in a new style. |
| Conservative Upscale | 40 | Enlarges the image while staying faithful to the original. See below. |
| Creative Upscale | 60 | Enlarges and invents extra detail. See below. |
| Text to Image | 8 | Generates from a description without uploading anything — the same idea as AI Image. |
Three similar-sounding tools with one clear difference. Erase removes something and leaves the space looking natural. Inpaint replaces part of the image with something new. Search and Replace lets you name the thing to swap in words, rather than marking it.
05 The prompt field is always required
Even for the jobs that look like they need no description.
Whichever tool you pick — including Remove Background and the two upscales — the Prompt box must be filled in before Generate will run. Leave it empty and the form simply refuses to submit.
Describe your subject in a few words — "a glass serum bottle, clean product shot". It gives the model useful context and satisfies the field. For Remove Background, naming the subject also helps it decide what to keep.
Remove Background is still the fastest useful thing in QynTro. Upload, type a handful of words, Generate — a clean cut-out for a store listing with no selection tools and no editing software.
06 Upscaling explained
The two most expensive tools here — worth understanding before you spend.
🔍Conservative — 40 credits
Enlarges while staying true to the original. Nothing invented. Use it on photos of real things — products, people, places — where accuracy matters.
✨Creative — 60 credits
Enlarges and adds detail that wasn't there. Use it on artwork, illustrations and very low-quality sources where a faithful enlargement would just be a bigger blurry image.
At 40–60 credits these cost as much as several ordinary edits. Upscale only at the end, on the one image you've decided to use — never on a batch you're still choosing from. And if the image is already large enough for its purpose, skip it entirely.
07 Advanced settings
Four controls. You can ignore all of them and still get great results.
Click Advanced Settings + to open them.
| Setting | Default | What it does |
|---|---|---|
| Negative Prompt | empty | What you don't want to appear. "blurry, extra hands, watermark, text". Add things here only when you keep seeing them. |
| Creativity | 0.5 | How much freedom the AI has to depart from your original. Lower stays closer to the source; higher invents more. |
| Control Strength | 0.7 | How tightly the result follows the structure of your uploaded image. Raise it when the composition keeps drifting. |
| Seed | 0 | 0 means random — a different result every time. Set a fixed number and the same prompt reproduces the same image, so you can change one setting and compare fairly. |
When you get a result that's nearly right, note its settings, set a fixed seed, and change one thing at a time. Without a fixed seed every generation differs for random reasons and you can't tell whether your change helped.
08 Practical recipes
Common jobs, and the tool that does them.
| You want to… | Use | Prompt |
|---|---|---|
| Put your product in a lifestyle scene | Reimagine | Describe the new setting and the light |
| Get a clean cut-out for a store listing | Remove Background | A few words naming the subject |
| Turn a square photo into a wide banner | Outpaint Image | Describe what should fill the new space |
| Delete a person or object from a photo | Erase Objects | Name what to remove |
| Swap one item for another | Search and Replace | "Replace the X with a Y" |
| Make a matching set of images | Same Style Image | Describe the new subject |
| Finish a rough sketch | Sketch to Image | Describe the finished look |
| Print something bigger | Conservative Upscale | A few words naming the subject |
09 Troubleshooting & FAQ
The questions we're asked most.
The edges around my subject look wrong
Usually the source image. Hair, glass and anything semi-transparent are the hardest edges to cut. Use a photo where the subject stands clearly against its background, and raise Control Strength so the result sticks closer to the original shape.
It changed things I wanted to keep
Lower Creativity and raise Control Strength. If it's still drifting, use a more precise tool: Search and Replace or Erase Objects change one thing, whereas Reimagine is designed to rebuild the whole scene.
Nothing happened when I pressed Generate
Almost always an empty Prompt box — it is required for every tool here, including Remove Background and the upscales. Add a few words describing your subject. Also check you've attached a Target Image, and that you have media credits left.
Can I run two tools on the same photo?
Yes — download the result, upload it again, and pick the next tool. Remove Background then Reimagine is a common pairing. Each step costs its own credits.
Which tool makes my low-quality photo usable?
Conservative Upscale if it's a real photo you need to stay accurate. Creative Upscale if it's very low quality and you'd rather have invented detail than a bigger blur. Do it last, once, on the final image.
Where do my edited images go?
They're saved to your account and appear under Documents → All Images alongside everything from AI Image. Download the ones you'll use commercially.